Sweet & Salty Bliss: Unveiling the Magic of Melt-in-Your-Mouth Toffee Bars
Imagine a dessert that dances on your palate, offering a symphony of textures and flavors in every bite. That, my friends, is the promise of salted toffee cookie bars. These aren't just any cookie bars; they're a decadent, multi-layered masterpiece, renowned for their irresistible blend of sweet, buttery goodness with just a hint of savory crunch. From casual family evenings to festive holiday gatherings, these melt-in-your-mouth treats have secured their place as a beloved classic. Forget complicated confections; these bars deliver pure joy with surprising ease, making them a fantastic addition to any baker's repertoire.
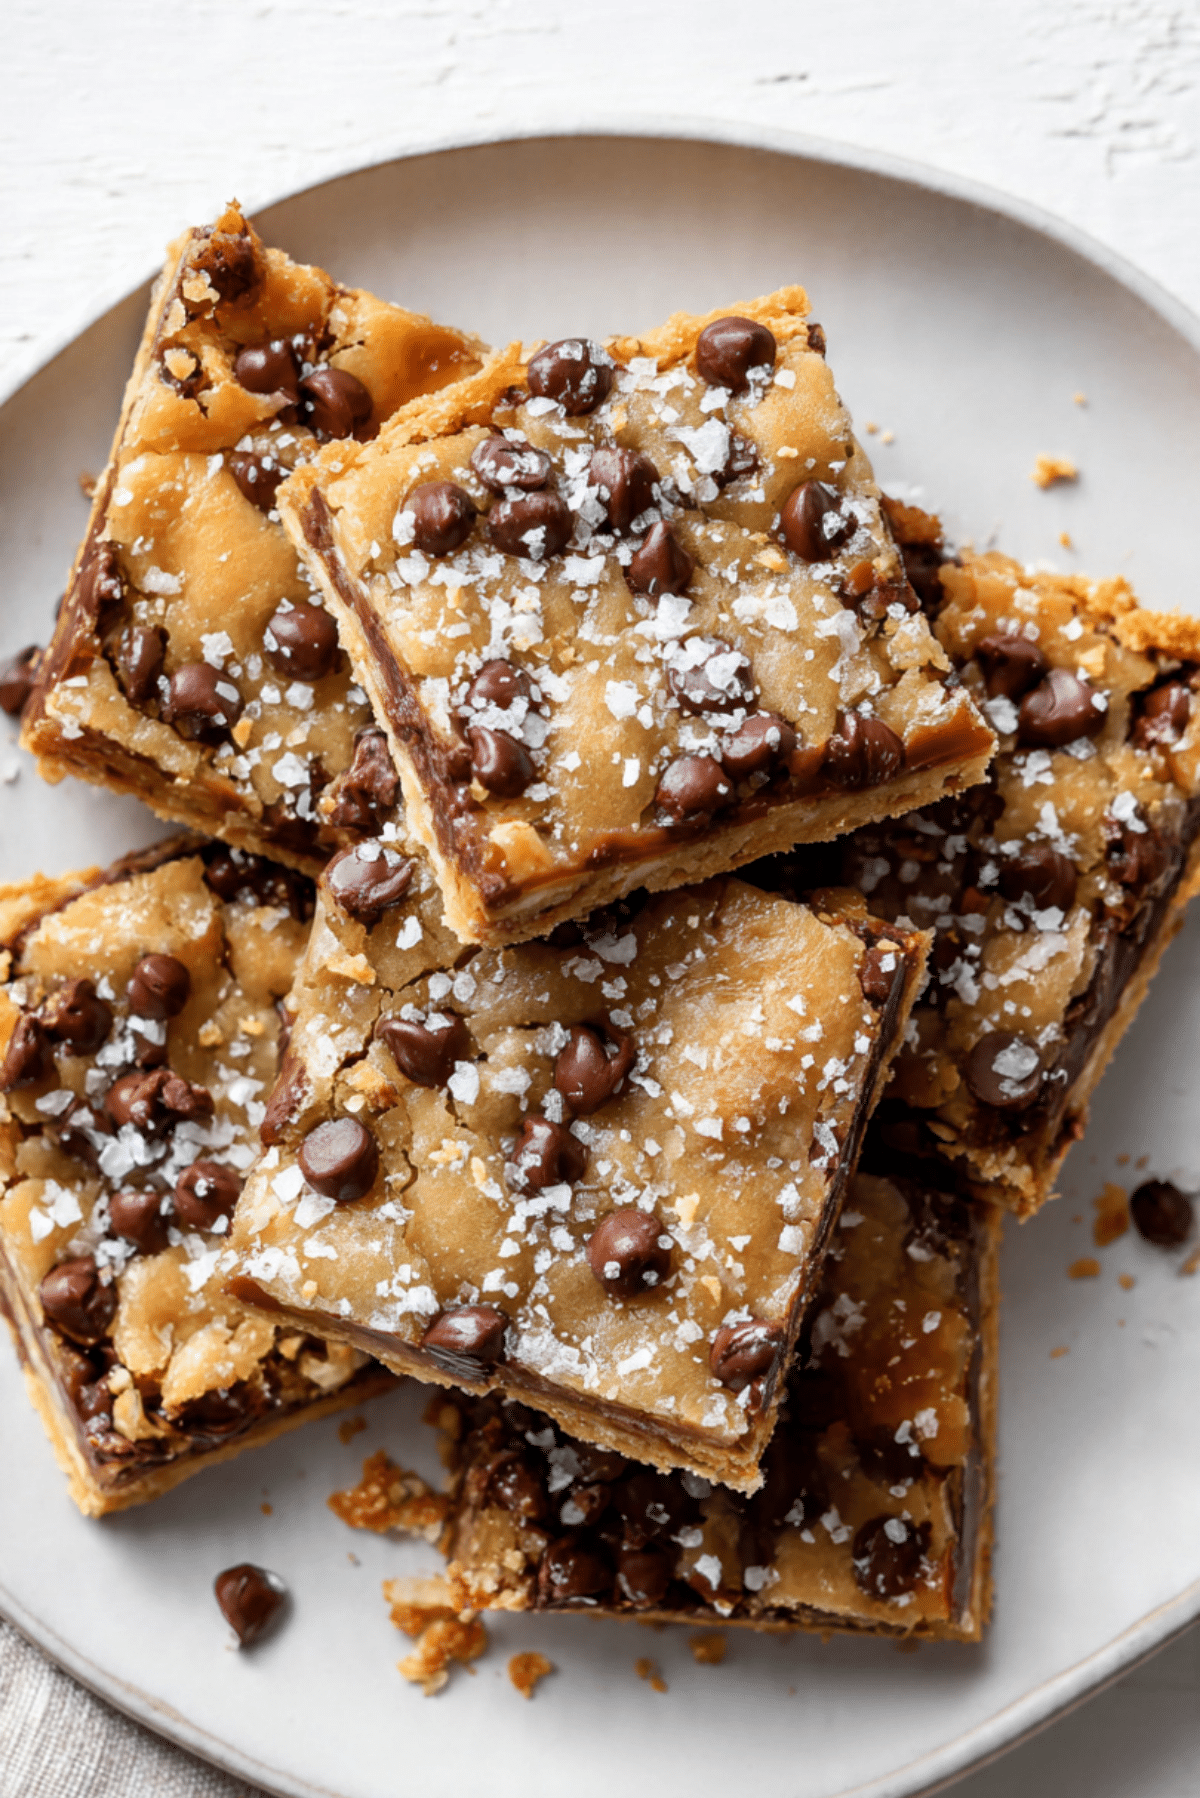
At their core, salted toffee cookie bars are a celebration of contrasting elements that come together in perfect harmony. They begin with a simple, yet profoundly satisfying, buttery sugar cookie base. This foundational layer provides a tender, crumbly canvas for the star players: a rich, gooey caramel topping, a luscious blanket of melted chocolate, and finally, a delicate sprinkle of coarse sea salt. It's this final flourish of salt that elevates the entire experience, cutting through the sweetness and enhancing every flavor note, making each bite an unforgettable adventure.
The Irresistible Charm of Sweet & Salty: Why These Bars Captivate
What makes salted toffee cookie bars so universally adored? It’s the ingenious combination of sweet and salty. This flavor dynamic isn't just a trend; it's a fundamental principle of gastronomy that excites our taste buds. The salt doesn't merely balance the sweetness; it amplifies other flavors, making the caramel deeper, the chocolate richer, and the buttery cookie more pronounced. This creates a complex, addictive profile that keeps you reaching for "just one more" slice.
Beyond the taste, the texture plays a crucial role. Each bar is a journey through layers of dessert goodness: the yielding chewiness of the cookie base, the sticky, smooth indulgence of the caramel, the creamy melt of the chocolate, and the subtle crunch of the sea salt. This multi-dimensional experience is what truly sets these bars apart from a simple cookie or a plain piece of candy. They are substantial enough to feel like a proper dessert, yet delicate enough to truly melt in your mouth, leaving behind a lingering sense of delicious satisfaction. They are the ultimate crowd-pleaser, perfect for sharing at a potluck, making them ideal for any social gathering. For more ideas on when to serve these delightful treats, explore our article: Salted Toffee Cookie Bars: Perfect for Holidays & Potlucks.
Crafting Your Perfect Salted Toffee Cookie Bars: A Step-by-Step Guide
Making these delicious bars is a surprisingly straightforward process, relying on common pantry staples and a few key techniques. Let's break down the layers to ensure your salted toffee cookie bars turn out perfectly every time.
The Foundation: A Buttery Sugar Cookie Base
Every great structure needs a solid foundation, and for these toffee bars, it's a simple yet sublime sugar cookie. You'll need:
- Unsalted Butter: The cornerstone of richness. Using unsalted butter allows you to control the overall salt content of the recipe.
- Granulated Sugar: For sweetness and tenderness.
- Eggs: Binders that add moisture and structure.
- Vanilla Extract: Essential for enhancing the sweet flavors. Use good quality extract for the best aroma and taste.
- All-Purpose Flour: The main structural component.
- Baking Powder & Salt: Leavening and flavor balance for the cookie.
The key to a perfect cookie base lies in proper mixing. Start by creaming the softened butter and sugar together until light and fluffy. This incorporates air, which contributes to a tender texture. Beat in the eggs one at a time, followed by the vanilla. Then, gradually add your dry ingredients, mixing on low speed only until just combined. Overmixing will develop the gluten, leading to a tough cookie. Press this dough evenly into a prepared baking sheet. Using parchment paper or aluminum foil, lightly sprayed with nonstick spray, can make removal and clean-up significantly easier.
Bake the base until it's lightly golden brown around the edges. It’s crucial to let the cookie layer cool completely before adding the next toppings. A warm base will cause your caramel and chocolate to melt and run into the cookie, rather than forming distinct, beautiful layers.
The Glorious Toffee & Chocolate Layers
Once your cookie base is cool, it's time for the star attraction: the toffee and chocolate. This is where the magic truly happens.
- Soft Caramels: Individually wrapped caramels work perfectly. Their consistent texture ensures a smooth melt.
- Heavy Cream: This is what transforms the caramels into a pourable, luscious sauce. Don't skimp on the fat content here; it's essential for the creamy texture.
- Chocolate Chips: Semi-sweet or milk chocolate chips are standard, but feel free to experiment with dark chocolate for a richer flavor profile.
To create the perfect toffee layer, combine the caramels and heavy cream in a saucepan over medium-low heat. Stir constantly until the caramels are completely melted and the mixture is smooth and glossy. The continuous stirring prevents scorching and ensures an even consistency. Remove it from the heat and let it cool for just a minute or two – this slight cooling helps it set more quickly once poured over the cookie base. Pour this warm, gooey caramel evenly over your cooled cookie.
For the chocolate layer, sprinkle chocolate chips over the warm caramel. The residual heat from the caramel will cause the chocolate chips to soften and melt. After a few minutes, use an offset spatula or the back of a spoon to gently spread the melted chocolate into an even layer, completely covering the caramel.
The Finishing Touch: A Sprinkle of Sea Salt
The grand finale! This isn't just for show; the sea salt is integral to the bar's flavor profile. Use a coarse sea salt or flaky sea salt, not fine table salt. The larger crystals provide bursts of salty flavor and a delightful textural contrast that truly makes these bars shine. Sprinkle it generously and evenly over the still-warm chocolate layer, allowing some of the salt to gently adhere as the chocolate cools. This small step makes a monumental difference in the overall taste experience.
Beyond the Bake: Serving, Storing, and Sharing
Patience is a virtue, especially when it comes to salted toffee cookie bars. Allow the finished bars to cool completely and set before attempting to slice them. This can take a few hours at room temperature, or you can expedite the process slightly by chilling them in the refrigerator for about an hour. Once firm, use a sharp, warm knife to cut them into even squares. Warming the knife under hot water and wiping it dry between cuts will give you cleaner edges.
These bars are not only incredibly delicious but also remarkably versatile. They're ideal for holiday baking, as they can be prepared well in advance. Once baked and cooled, slice them and store them in an airtight container, layered with parchment paper, in the freezer for up to several months. This makes holiday prep a breeze, allowing you to simply pull them out and thaw when you're ready to serve. This make-ahead capability also makes them perfect for unexpected guests or spontaneous dessert cravings. For more comprehensive guidance, check out our article: Easy Salted Toffee Cookie Bars: Your Ultimate Dessert Guide.
Serve them at room temperature for the best texture and flavor, where the caramel is soft and gooey, and the chocolate is perfectly melty. They pair wonderfully with a cup of coffee, a glass of milk, or even a scoop of vanilla bean ice cream.
Tips for Toffee Bar Triumph: Expert Insights
- Don't Rush the Cooling: This is perhaps the most critical tip. A fully cooled cookie base and fully set layers are key to clean, distinct layers and easy slicing.
- Quality Matters: While the ingredients are simple, using good quality butter, real vanilla, and chocolate that you enjoy eating will elevate the final product.
- Even Spreading: For uniform bars, ensure your cookie dough is pressed evenly into the pan and your caramel and chocolate layers are spread smoothly to the edges.
- Caramel Consistency: If your caramels seem too thick even with the heavy cream, a tiny splash more cream (a teaspoon at a time) can help, but avoid adding too much, which can make it too runny.
- Clean Cuts: As mentioned, a warm, sharp knife is your best friend for neat slices. Wiping the blade clean after each cut prevents sticky residue from marring your next slice.
- Experiment with Chocolate: While semi-sweet is classic, consider using a blend of milk and dark chocolate chips, or even finely chopped chocolate bars for a gourmet touch. White chocolate can also be drizzled on top for extra visual appeal.
- Add Nuts: For an extra layer of texture and flavor, sprinkle chopped pecans or walnuts over the caramel layer before adding the chocolate. Toasting the nuts beforehand will intensify their flavor.
A Sweet & Salty Legacy Awaits
Salted toffee cookie bars are more than just a dessert; they are a delightful experience waiting to unfold in your kitchen. Their undeniable charm lies in the perfect interplay of sweet and salty, rich and tender, making them an instant favorite for any occasion. With simple ingredients and straightforward steps, you can create a treat that looks impressive and tastes absolutely heavenly. So, preheat your oven, gather your ingredients, and prepare to create a batch of these melt-in-your-mouth bars that are sure to become a cherished family tradition.
